Announcement

Collapse
No announcement yet.

Calling all GAI Filler/Capper users

Collapse
X
 
  • Filter
  • Time
  • Show
Clear All
new posts

  • #76
    Kyle--in trying to isolate which part of the head was causing the foaming, I switched out the internals--the product/equalizer valve assy--for one from another head. Problem solved.

    As for the gushing at the beginning of the run, we have the same problem, especially during warm weather. Running the machine slowly (like 25-2600 b/hr) for the first few cases pretty much solves the problem. With the machine running at a lower speed, the snifter (ambient eq. valve) is open longer, this seems to help greatly. We're usually up to full speed after about 10 cases, until we hit the wall again at the end of the bright tank, when the warm, stratified beer at the top starts coming through (badly designed jackets). Then it's back to 2500 b/hr until the bright is empty.

    The bent crown problem seems to be insolvable. One or two crowns every 1,000 bottles or so seems to be about as good as it gets. Wish we had that crown detector to stop the line when this happens as we waste too much product before someone notices that there are no crowns on the bottles--we run a very short crew. Foamy beer seems to make the problem worse, and carefully cleaning the lower crown channel--the part that pivots down--and drying it seems to help.
    Timm Turrentine

    Brewerywright,
    Terminal Gravity Brewing,
    Enterprise. Oregon.

    Comment


    • #77
      Capper driving down out of alignment

      Hey all,
      Over the past month or so we've had the tremendous problem of our star wheel (it seems) somehow not lining up with the capper for whatever reason (broken glass/jammed bottle) and the side of the capper driving down on the side of a bottle. This jolt causes the drive cam to come out of alignment and I have to strip down the assembly to line the cam back up properly in the track that it runs on. This takes about 30 mins but it's a real pain to have to stop bottling and fix. It seems our sensor isn't registering in time to stop the machine before the capper drives down off center on the neck of a bottle. Has anyone experienced this problem and have a solution?
      -Thanks

      Comment


      • #78
        On the bottom of the shaft that drives the starwheel--under the deck--is a nut (19mm IIRC) supporting a spring. Tension on this nut determines how much force it takes to knock the starwheel out of alignment. Tighten it--it comes loose fairly often. Check the action of the micro-switch that sits near that nut. With the machine running, pulling the arm of the switch down should cause the machine to shut down with an warning. Obviously, be very careful when testing this! If the switch does not shut the machine down, replace it. If it does, but doesn't shut the machine down when the wheel gets bumped out, bend the arm up towards the clutch assembly--just a little.

        We've found that the main cause of that wheel getting knocked out of alignment is bottles bouncing partially out of the slot in the wheel when they hit it. We solved this problem by making sure there are always at least two bottles lined up at the entry to the wheel. Just hold the first bottle out of the filler until a second emerges. The second bottle keeps the first from bouncing out of the slot.

        If the cam follower that drives the capper is "coming out of alignment", remove the entire assembly that holds (2 Allen bolts and the grease zirc on its 14mm bolt) it and make sure the threaded shaft the follower bearing rides on isn't broken inside its bracket. The hole drilled through the shaft for greasing is a bad weak point. We've had this happen twice, from the same causes you mention.
        Last edited by TGTimm; 12-15-2014, 10:19 AM.
        Timm Turrentine

        Brewerywright,
        Terminal Gravity Brewing,
        Enterprise. Oregon.

        Comment


        • #79
          Pedestal pnuematic seals replacement?

          Anyone done this recently? Victor from AWS Prospero went over it briefly with me a year or so ago, but I may have forgotten something. I'm currently stuck at trying to unscrew the top of the pedestal, but having the bottom of the shaft unscrew instead. Another simple job derailed by Italian engineering and love of Loc-Tite.
          Timm Turrentine

          Brewerywright,
          Terminal Gravity Brewing,
          Enterprise. Oregon.

          Comment


          • #80
            Pneumatic pedestal seals R&R

            Got 'er done, finally. No photos, sorry, but this was a very greasy/oily job, and I was under some time pressure.

            This procedure is something you'll need to do every few years, depending on usage. I, of course, waited until it was overdue, with the cylinder lube reservoir emptying in a few minutes, and the sound of leaking air rushing from within the machine.

            This is for a GAI 300A Bier, 12 head filler. The diagram number is 30012-41000 in my manual--ymmv.

            Parts:

            At least 12 each of these, a couple of spares would not be a bad idea, esp. the seals:
            DE-000000156--Pneumatic seals.
            OR 3168
            OR 119
            OR 153

            Having a few of these on hand, maybe 4 each, would be a good idea:
            OR 2062
            OR 3081 (EX 127)

            Some pneumatic tool oil and/or pneumatic tool seal grease, an ounce will get you through.

            Loc-Tite 542 thread locker/sealant or equivalent.

            A bunch of disposable shop rags--there will be grime!

            Tools:

            A 5/16" X 4 or 5" grade 8 machine bolt, with head cut off and threads covered with electrician's tape, or better yet, shrink tubing. Leave the last 1/2" of the unthreaded portion bare. Be ready to make another if you trash the first one.

            1-2 lb dead-blow or soft mallet.

            8mm Allen wrench, preferably one that fits on a 3/8" drive ratchet wrench.

            13mm combination wrench and 13mm 3/8" drive socket.

            8" (200mm) Crescent wrench, or 24mm socket.

            At least 12 oz. of liquid patience.

            To work!

            The biggest problem with this procedure is that there are several parts that are threaded on both ends, one end of which you'd like to have unscrew, the other not. Unfortunately, you have little or no control over which end unscrews, so there are actually four different ways this can go, two fairly easy, one difficult, one a PITA.

            First, make absolutely sure the air supply to the machine is shut off and locked/tagged out, and all air pressure is relived. You're gong to be unscrewing things that can become pretty good bullets if there's pressure in the system, so be double sure. The pedestals will all be at their lowest position.

            Setting the machine to "Manual", get the hand-control paddle to the back of the machine. Open the two doors behind the filler, and rotate the filler until head #1 (or wherever you feel good starting) is facing you. Look under the head of the pedestal for the holes drilled into the pedestal head. This is where you'll put the unthreaded end of the 5/16" bolt. Don't bother trying turning it by hand--remember GAI loves red Loc-Tite--you'll just bend the bolt. Using the mallet, hit the base of the bolt a few good whacks, driving it counter-clockwise.

            Now luck comes into play.

            Dissasembly Mode 1: The head of the pedestal starts to unscrew. Celebrate. You're lucky this time. All but two of the twelve on my machine came apart this way. Have a victory sip of the Liquid Patience and finish unscrewing the head by hand.

            Mode 2: The entire pedestal and shaft unscrews. Bummer. Not your moment. This would be a good time to hit that Liquid Patience. I'll cover Mode 2 later on down the line.

            Mode 1, cont: Now you have the pedestal head in your hand and you're likely looking at a big mess of black goo inside the pedestal shaft. That's what's left of the pneumatic seal, mixed with the pedestals lubrication oil. In the center of the mess is an 8mm Allen recess. Using the 8mm Allen wrench, with your off-hand fingers crossed for luck, unscrew the button that holds the seal.

            If you're lucky this time, the button unscrews from the inner shaft. This is mode 3.

            If you're not, the entire inner shaft unscrews at the base. This is mode 4. I'll cover this later. Have another sip of patience.

            Mode 3, cont: You're really in luck this time! Get as much of the black grime off the button as you can, pry the seal off the end, and clean some more. There's a little o-ring (OR 119) around the base of the button. Remove it. Clean some more. Lightly oil or grease the new o-ring and replace it. Lightly grease the top and seal area of the button and carefully slip the new seal over the button, cupped side up.

            Oops, gotta go--more later.
            Last edited by TGTimm; 03-19-2020, 10:32 AM.
            Timm Turrentine

            Brewerywright,
            Terminal Gravity Brewing,
            Enterprise. Oregon.

            Comment


            • #81
              Done with chores, for now....

              Mode 3, more:
              Remove the o-ring (OR 3168) from the outer pedestal shaft. Clean the top of the shaft and the recess inside as well as possible. Lube the inside of the shaft with a smear of oil or grease. Lube the outside of the seal. Use a couple of drops of Loc-Tite 542 on the threads of the button, then thread it back into the top of the shaft. Replace OR 3168, lube it. Put a couple of drops of LT 542 on the male threads of the shaft, and thread the pedestal head back on. Snug it down nicely with the cut-off bolt, but don't use the mallet.

              You're done--move on to the next pedestal and start over. Unless....

              Mode 2: The entire damned pedestal and shaft unscrewed from the bottom.

              You're now looking at the top of the inner pedestal shaft, with a greasy, gooey mess at the top. It's partially covered by the upper bushing housing (part 41030), which is held onto the plate of the filler with four 13mm head bolts. Take 'em out. Unfortunately, the nice folks at GAI glued this housing down with silicone seal, so you'll have to pry it up, and there's no room to get anything under it. A sharpened flat screwdriver or a wood chisel (not my wood chisel!) and some gentle tapping with the mallet should get it moving. Have fun.

              Having got the housing off, you can now see two plastic split-rings near the top of the inner shaft. If you don't they're somewhere down below. There will also be a red rubber ring and a steel ring somewhere near the base of the pedestal shaft. Remove the split rings and the seal at the top of the shaft, clean everything you can reach, lube the seal seat and seal, and replace. The split-rings fit into two shallow reliefs near the top of the inner shaft.

              Clean the bushing housing and replace the o-ring (OR 153). Lube the inside of the housing and o-ring.

              Clean the outer pedestal shaft, inside and out. Use some solvent to get as much crud out of the inside as possible. Lube the inside up pretty well. Slide the bushing housing up over the outside of the shaft. Put a couple of drops of LT 542 on the threads of the shaft. Very carefully guide the new seal into the pedestal shaft, but don't try to push the shaft over the first split ring. Holding the shaft and bushing housing in one hand, grip and compress the first split ring into its recess with the other hand and the second split ring with another hand. Slide the shaft down over the split rings. Any resistance, and you haven't caught one or both of the rings right. Start again. At this point, the bushing housing will likely slide down and smash a finger or two. Liquid Patience!

              Once you've gotten the shaft over the two split rings, slide the bushing housing into its place (new silicone sealant is an option) and secure it with its four 13mm bolts. Reach below the filler deck and slide the red rubber ring onto the shaft, then the steel ring. Seat the shaft into its threads. Screw the shaft back into place, using the 5/16" rod to tighten it up by hand--no mallet.

              Celebrate and move on to the next pedestal.

              Mode 4: You got the pedestal head off just fine, but the inner shaft unscrewed at its base and came out.

              Remove the two split rings from the inner shaft. Remove the seal. Carefully clean the whole shaft. Lubricate the seal seat and seal and slip a new seal into place, cup side up. Lubricate the inside lip of the bottom or the shaft. Use a drop or two of LT 542 on the female threads, as close to the edge as possible. Put the split rings back into their recesses. Carefully lower the inner shaft into the outer. About the time the first of the slip rings slides into the outer shaft, the inner shaft will stop dropping. Have a sip of patience and carefully wiggle the inner shaft around until it goes home. You'll probably miss getting the second slip ring into place--and likely mash a fingertip--so repeat until everything is right. Tighten the inner shaft with the 8mm Allen wrench.

              Oh-Oh! The damned shaft just keeps turning. Time to get really greasy. Under the lower deck of the machine is the plate that carries the gears that run the filler. Above that plate is another plate, with some large (maybe 22mm?) bolts that correspond to the bottoms of the pedestal shafts. Using a properly sized socket wrench or an Universal Metric-ASE Ambidextrous End Wrench (Crescent wrench), hold this bolt while tightening the inner shaft. Wipe the blood off your greasy knuckles and have a sip of patience.

              Remove the o-ring from the top of the outer shaft (OR 3168), clean the area well, replace and lube the o-ring. Add a couple of drops of Loc-Tite and screw the head back on. Tighten by hand with the 5/16" rod.

              Repeat 11 more times!

              Some notes:

              Most of the pedestals came apart as desired, Modes 1 & 3. Two came apart as Mode 2, and four as Mode 4.

              The Loc-Tite 542 is more of a thread sealant than a thread locker. Sure, all the places I suggest using it are sealed with o-rings, so, if you trust o-rings and enjoyed taking these things apart and putting them back together, skip the LT 542.
              Last edited by TGTimm; 01-26-2015, 03:35 PM.
              Timm Turrentine

              Brewerywright,
              Terminal Gravity Brewing,
              Enterprise. Oregon.

              Comment


              • #82
                Gushers!

                Hey guys,
                Love the thread. I'm going on my 7th month working with a new GAI 3003 machine. The last two days I've had to shut down due to gushing bottles. I was wondering if anyone else has had this problem and what you have done to solve it.

                The Symptoms:
                - I can get 20 to 30 cases to run without a problem at low speeds (1500-2000bph) but then I start to get gushers even when running < 2000 bottles per hour. Once the gushing problem starts slowing down doesn't seem to help.
                - Bottles are gushing upon being released from the seal position. The problem starts with just a few bottles gushing on different heads each time and then escalates quickly until >80% of the bottles are gushers
                - It looks like a lot of gas is being released from the product when the leveling button is depressed and when the equalization button is depressed.
                - The bowl pressure seems to inconsistent while I'm running. With the setpoint at 2.7, I would see the pressure rise up to 2.9 while product was being pumped in and drop down slowly taking at least 30s to 1 min. I did check the manual valve on the pressure relief system and it is wide open.

                Run Conditions:
                (I ran these conditions as well as adjusting up and down from 2.3 bar - 2.7 trying to solve the issue)
                Product CO2 volumes: 2.5
                Bright tank pressure: ~10psi
                Bowl Pressure: 2.7 bar
                Burket Valve: 6 bar
                Pump Pressure: 3 bar (we use air powered peristaltic pump controlled by the machine)
                Leveling Pressure: 2.8 bar
                Counter Pressure: 3 bar
                Bowl Temp: 1-3 C (read on the analog gauge on top of the bowl)
                Vacuum Pressure: Unknown (discovered the gauge was broken while checking the vacuum system. New one on the way from prospero)

                What I've Tried:
                - Running a full caustic / paracetic cleaning cycle
                - Taking off the number plates and pulling and greasing all of the buttons which control the different filler operations
                - Changing run conditions all over the map

                Please Help! After two days of shutdown and a bunch of wasted IPA I'm losing my patience (and so is management YIKES)

                Thanks!
                Pete

                Pete Koelsch
                Packaging Engineer
                Wyndridge Farm Craft Brewery
                Explore our craft beverages, scratch-kitchen dining, stunning wedding venue, lodging and events in the rolling hills of south-central PA.
                Using Tapatalk

                Comment


                • #83
                  Peter--

                  Looks like you have some work and exploration ahead of you!

                  If you removed and "greased" the poppet valves behind the number plates on the filler heads, you probably damaged the o-rings (OR 114) on the outside of the valve bodies. The cross-bores of the bores these valves fit into are very sharp and destroy those o-rings almost every time the valves are removed/replaced. Somewhere above I detail the use of a Flex-Hone abrasive brush to ease these sharp edges. Expect to spend a couple of hours on this and replace all those o-rings. These o-rings are so fragile I keep a few hundred on hand and replace them every time I remove a valve--even after polishing the bores.

                  While you have the valves out (and be careful to note that there are two different springs--the heavier one goes in the bottom (vacuum) bore), remove the orifices behind the center--snifter or equalizer--valve and carefully clean them. I use a very small drill bit meant for cleaning an acetylene torch orifice (Drill #67).

                  While you have the valves out, you may as well replace all the o-rings in the valves.

                  If these things don't work--and, unfortunately, the only way to find out is to run beer through the line--let me know and we'll try again.

                  Seven months is a pretty short time for the next step, but you all may be running the GAI more than we do. Look through this post for the instructions for rebuilding the filler heads. I usually do this about once a year.

                  Sorry to make you go back through all these pages of this post, but if you do, you'll find the instructions for polishing the valve bores and the part number of the Flex-hone to use. The Flex-Hones are cheapest from the manufacturer, Brush Research. Expect to pay about $15 for each. One set will do all the bores.
                  Timm Turrentine

                  Brewerywright,
                  Terminal Gravity Brewing,
                  Enterprise. Oregon.

                  Comment


                  • #84
                    Well, I though I had written up the tear-down and re-assy for the filler heads, but I can't seem to find it. Maybe next time....

                    Peter--while you're at it, here's something else it's time for you to do: http://discussions.probrewer.com/sho...122#post118122

                    Have fun!
                    Timm Turrentine

                    Brewerywright,
                    Terminal Gravity Brewing,
                    Enterprise. Oregon.

                    Comment


                    • #85
                      Just Arrived

                      Greetings,

                      We just recently received our new bottler. 12 oz bottles are doing well, we were told that our machine was also compatible with the 750ml beer and champagne bottles that we cork and cage. We tried to set up for the change over to do a run on our larger bottles and our having problems with the timing screws. My question is. Have you or anyone on this thread done 750ml bottles, and if so are there any tips that may assist us in being able to perform this task.

                      Cheers,

                      Joe


                      Originally posted by TGTimm View Post
                      We've been using a GAI 3003A-Bier 12-head filler/capper for about 4 years now.

                      Things are starting to wear, the manual is near incomprehensible and incomplete; so I thought it might be a great idea to get any users here together to share tips and suggestions and maybe brainstorm about solutions and preventative maintenance needs.

                      BTW, the GAI 3003A is BY FAR the best filler/capper we have used in over 14 years of operation--and it's our third filler/capper. We run at 3,000+ bottles per hour, one or two days per week. No complaints, but, hey, we need to talk....

                      Timm

                      Terminal Gravity Brewing

                      Comment


                      • #86
                        What model do you have? Are you using change-out parts for the different bottles?

                        If the timing on the screws/starwheels is off, it's easy enough to adjust. The screws have 3 Allen screws on each end--loosen these, and you can adjust the timing a little. The starwheel retaining screws are under the screw-in cover on the central axle of the wheel. Loosen the screw, then give the wheel a good pop, and it'll come loose, allowing for adjustment.

                        The wheels must be adjusted to time with the rinser and filler, obviously, then the screws to match the wheels.
                        Timm Turrentine

                        Brewerywright,
                        Terminal Gravity Brewing,
                        Enterprise. Oregon.

                        Comment


                        • #87
                          Filler heads rebuild

                          Well, I thought I'd put this together previously, but apparently I just took the pics, posted them to Flickr, and forgot about it. Time to get it together!

                          With IMG turned off, this is a bit of a fiddle. I've posted links to my Flickr account instead of imbedding the pics.

                          I've been rebuilding the filler heads about twice a year, or when we start to get filling problems with more than one head. For single-head problems, I usually just tryto fix that one head.

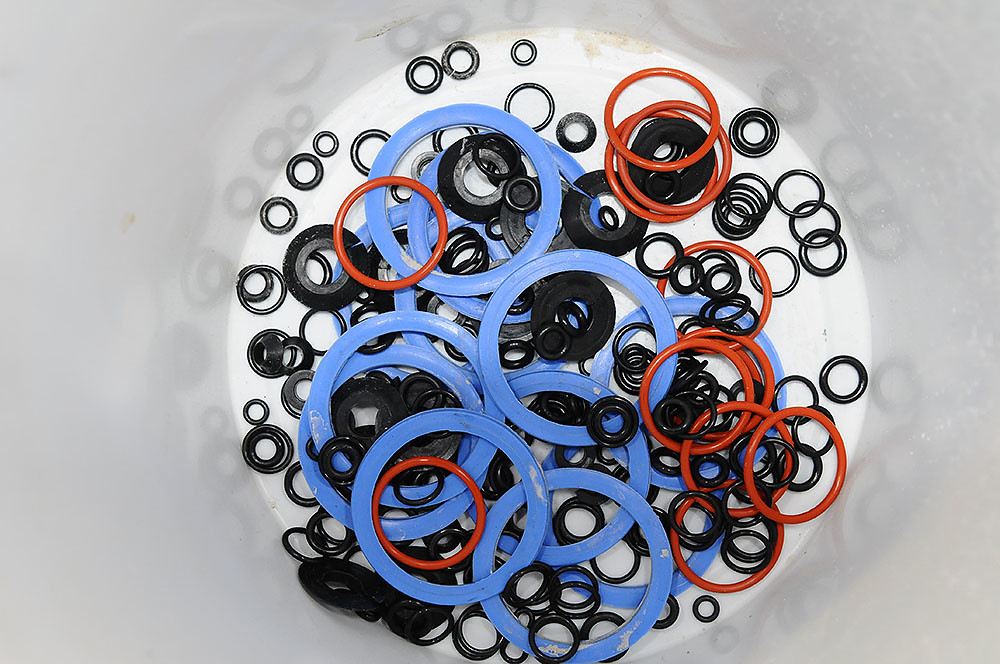
                          Here's my inventory of gaskets and o-rings for the heads:


                          The Chinook numbers are x-refs for o-rings from Chinook O-Ring in Beaverton, OR. Great prices, low minimum orders. I keep enough of the parts to perform two complete rebuilds, and re-stock when I drop below that number. Here's my Excel inventory sheet: Well, sheet, I can't figure out how to share it here! PM me and I'll send it to you in an e-mail.

                          So, now you have the parts. Let's get going.

                          Turn the triangular valve cam on the bowl above the valve fully Clock-Wise (where it should be, anyway). This will allow the gas valve on the inside of the filler head to disengage from the lifting fingers of the cam inside the bowl. Remove the filler heads by unscrewing the two large Allen bolts on the bottom of the heads. Sorry, no pic--you'll figure it out.


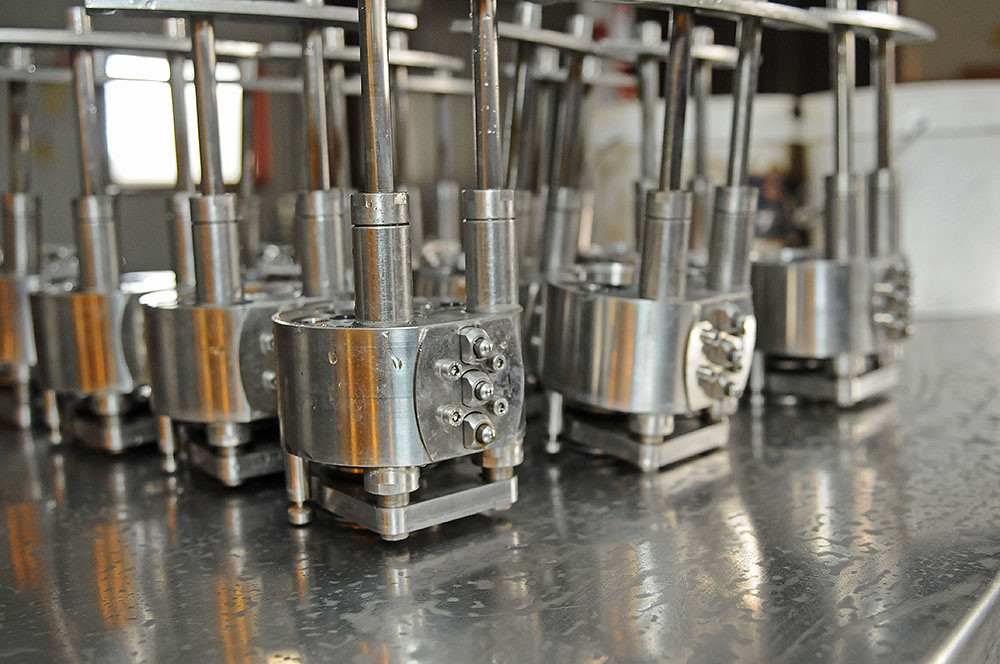
                          Lots of shiny SS! I've removed the inner parts of the filler heads after unscrewing the leveling tubes using the little tool that GAI provides, but of course I've modified it to make this job easier:


                          I cut off the hand wheel that was on the end of this tool, then welded a 10mm X 3/8" drive socket onto the tube. Much easier to use, and I'll never have to sort through dozens of cases of beer to find the bottle with the leveling tube in it (this really did happen)! Just be careful not to over-tighten.

                          First, let's replace the bottle seals. Using a couple of small standard screwdrivers, pry the old seal out. Don't expect them to come out entire, and don't worry about it. Clean the groove the seals reside in carefully (I strip everything down and run the parts through our ultra-sonic cleaner, but still have to do some scrubbing).

                          Here's a clean seal holder ready for a new seal, with fresh seals:


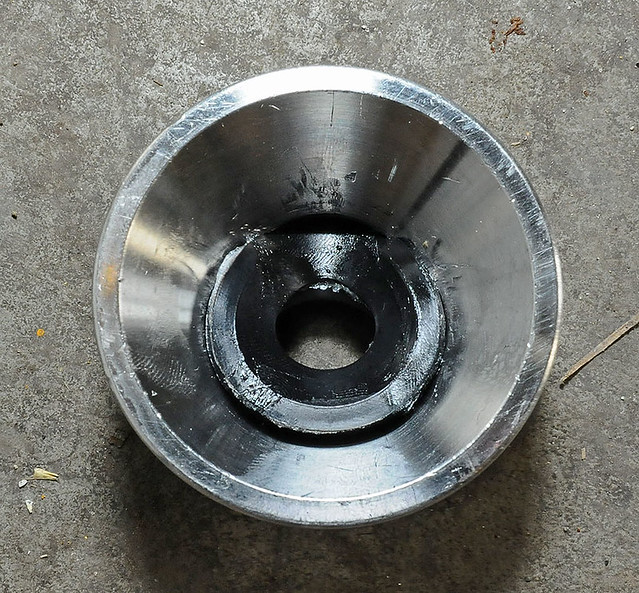
                          I use a cheap drill-press to press the seals in. You don't have to do it this way, but it saves a week or so of fighting with that thick, tight seal:


                          The socket is 13/16", the tube the holder is resting on is a 1" copper cut-off.

                          Getting the seal started in it's groove is key. You'll need to hold it in place with a finger while you get the holder into the press:


                          Of course, I'm using that finger to hold the camera....

                          While holding the one edge of the seal in the groove (this will take some practice, but you've got twelve of these to do), press the opposite side in with the socket. The seal should pop right in if you've got it started right.

                          Gotta go figure out a cooling problem....
                          Last edited by TGTimm; 07-01-2015, 01:45 PM.
                          Timm Turrentine

                          Brewerywright,
                          Terminal Gravity Brewing,
                          Enterprise. Oregon.

                          Comment


                          • #88
                            OK, that's done. Set the re-sealed bottle seal holders aside and let's move on.

                            The product/gas valve assembly is next. It has two seals, one difficult to replace, the other... you'll see.

                            This is the product closing seal:


                            Pry it out with your handy little screwdriver, and again, don't worry about tearing it. Clean the groove.

                            Getting this seal back on isn't easy, and getting it on right ain't either--but is absolutely critical. Grease the end of the valve assy with your CIP or soap, and carefully force the seal into place. Be sure you have a few spares as at least one will tear and another will go zinging off across the room, never to be seen again.

                            Once the seal is in its groove, run the back of a fingernail around the seal--pressing as hard as you can--where it meets the groove. The seal must be completely seated in the groove, with absolutely none of the flat part of the seal showing, unlike this:


                            That ain't good enough. See the little flat bit exposed lower left? That's gotta go all the way into the groove. The first pic of the seal above shows it properly seated--the tapered part of the seal neatly meeting the taper of the shaft. If the seal isn't fully seated, the product (beer) will not stop flowing, ever. Super over-fills or pure foam will be the result.

                            Next, the gas seal at the top end of the assy:


                            This is the fun one. The goldanged roll pin holding this together can't be removed by driving it out--the end will just mushroom. I've been meaning to make or buy a "pusher" to remove it, but in the meantime I've found a difficult work-around.

                            Using a seal remover tool (hook) and a tiny screwdriver (or two tiny screwdrivers), lift the o-ring out of its groove. With a sharp blade, cut the o-ring and pull it out.

                            Find a piece of tubing or a small deep-socket that just fits over the inner shaft (triangular thing) in the center of the valve. Grease the new o-ring up nicely, get it started on the shaft, then push it down as far as it will go with the tube. Using one tiny screwdriver, get one side of the o-ring into the groove, and hold it there. With your third hand, get the other side into the groove and use a tiny screwdriver to work the other sides into the groove. Easy, huh?

                            Work the gas valve back into the spring on top of the valve assy and set it aside. Repeat.
                            Last edited by TGTimm; 06-30-2015, 02:52 PM.
                            Timm Turrentine

                            Brewerywright,
                            Terminal Gravity Brewing,
                            Enterprise. Oregon.

                            Comment


                            • #89
                              Now the main filler head body and its poppet valves.

                              Remove the front (numbered) pales from the main body. Don't particularly worry about getting the same one back on the same body unless it bothers you. Pull the poppet valves out and remove the springs behind them. I replace these springs every couple of years.

                              Note that one of the three springs is heavier and longer than the others:


                              This spring goes in the bottom bore.

                              Remove all the rubber from the poppet valves and clean them thoroughly:


                              I don't much worry about the blue plastic guides unless they're in really bad shape.

                              Replace the o-rings, being sure to lube 'em up with some silicone plumber's grease.

                              Now for the notorious bores those poppets go into:


                              This is a view into the bore of the vacuum poppet. See that cross-bore? It comes from the factory razor-sharp, and it's almost impossible to get a poppet back in without slicing a bit out of the o-ring that seals the back of the poppet. This causes much grief, mostly in the form of foam-over.

                              This is what is needed to fix those bores:


                              Here's the part number:


                              Buy them from Brush Research's website--right there on the card--as that seems to be half the price of anywhere else (~$15). One of these will do all the bores in the heads, but you might get two just in case.

                              Basically, just follow the instructions on the card. You'll need a drill and some very soapy water for a cutting lube. When the lower part of the brush wears to where the balls are about gone, cut that part off and keep going with the remainder.

                              Now you've taken the razor edge off that cross-bore and life will just be that much better.
                              Timm Turrentine

                              Brewerywright,
                              Terminal Gravity Brewing,
                              Enterprise. Oregon.

                              Comment


                              • #90
                                Remove all the rubber from the main body and clean it really well--use brushes in the ports and passages, etc. You don't want any grit from the bore polishing left behind to cause problems.

                                Be sure to remove the orifice from the center poppet bore (the snifter, which if blocked causes gushing foam-over when the bottle is released from the bottle seal)--should'a done this before polishing--and be sure it's clean and clear:


                                #67 drill bit in a pin drill.

                                Don't forget or miss these rings:


                                which may be stuck to the bottom of the bowl, and these:


                                which are hiding under those things on the bottom of the main body. The screws are red Loc-Tited in and may require some heat to break loose (soldering gun works great). I don't bother with the Loc-Tite when I put 'em back together, and have never had one back out.

                                Get out the buckets full of clean parts


                                and put those critters back together. Don't forget to replace the collars on the leveling tubes:


                                Be careful to get the big poppet spring in the bottom (vacuum) bore, and get the three poppet valves aligned properly--the top two with the port on the right, the bottom one with it on the left. All the poppets are identical, so don't sweat it.

                                Put the heads back on the machine--I prefer to keep the numbers in order--and run a complete cleaning cycle on the machine--use caustic or PBW or whatever to get the CIP lube out.

                                It might take a while for the product and bottle seals to "work in" on the first run, so don't panic until after the first couple of cases.

                                Have a beer and figure out a cool art project using all those shiny rings while relishing the idea that this is done for a while.

                                Last edited by TGTimm; 07-01-2015, 01:52 PM.
                                Timm Turrentine

                                Brewerywright,
                                Terminal Gravity Brewing,
                                Enterprise. Oregon.

                                Comment

                                Working...
                                X